

Dry Brush Watercolor Tutorial for Beginners and Beyond unlocks the captivating world of textured watercolor painting. This tutorial guides you through the essential techniques, from mastering basic brushstrokes to creating stunning landscapes and intricate textures. Whether you’re a complete novice or seeking to refine your existing skills, you’ll discover the unique expressive potential of the dry brush method. We’ll explore essential materials, step-by-step projects, and troubleshoot common challenges, ensuring a rewarding learning experience for all skill levels.
We’ll cover everything from preparing your workspace and choosing the right brushes and paints to understanding the nuances of water control and color blending. You’ll learn to create a variety of textures, from the delicate smoothness of petals to the rugged roughness of bark, all through the simple yet powerful technique of dry brushing. This tutorial provides practical exercises and illustrative examples, allowing you to develop confidence and creativity in your watercolor journey.
Introduction to Dry Brush Watercolor
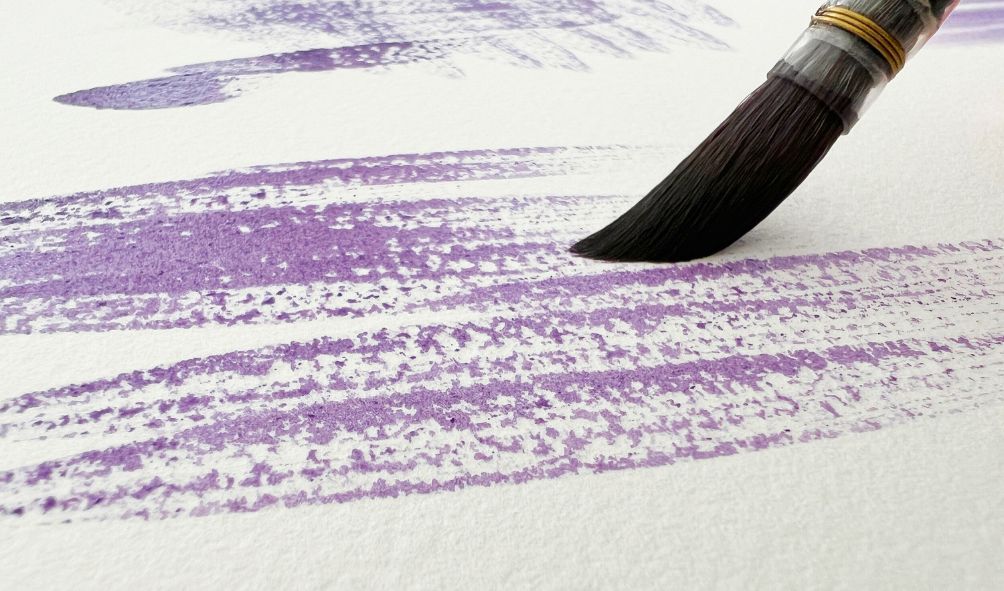
Dry brush watercolor is a captivating technique that allows artists to create unique textures and effects, moving beyond the typical smooth washes associated with watercolor painting. This technique involves using a brush with minimal water, resulting in a textured, almost scratchy appearance that can add dynamism and visual interest to your artwork.
The resulting pieces often have a distinctive, slightly abstract quality, making it a perfect technique for both beginners seeking to explore new textures and experienced artists looking to add another layer of expression to their work.
Dry brush watercolor offers a wide array of artistic possibilities. The limited water on the brush creates a broken color application, leaving behind visible brushstrokes and a sense of movement. This contrasts sharply with the smooth, even washes typical of traditional watercolor, providing a more expressive and less controlled aesthetic.
The technique is particularly well-suited for depicting textured surfaces like bark, stone, or fur, where the irregular application of paint mirrors the natural irregularities of the subject. It also works well for creating atmospheric effects, such as hazy skies or distant landscapes, where the broken color creates a sense of depth and distance.
Necessary Materials for Beginners
Gathering the right materials is crucial for a successful dry brush experience. Beginners will find that a relatively small selection of supplies is sufficient to start exploring this technique. High-quality materials are not strictly necessary to begin, but better materials will undoubtedly contribute to a more enjoyable painting experience.
- Watercolor Paints: A basic set of watercolor paints, either in tubes or pans, will suffice. A selection of earth tones (browns, yellows, ochres) and cool colors (blues, greens) is a good starting point, as these colors lend themselves well to the dry brush technique. Student-grade paints are perfectly acceptable for beginners.
- Brushes: Round brushes with relatively stiff bristles are ideal for dry brushing. Synthetic brushes are a good, affordable option. Choose a size that feels comfortable in your hand; a size 6 or 8 is a good starting point for most applications.
- Paper: Cold-pressed watercolor paper is recommended for beginners. This type of paper has a slightly textured surface that holds the paint well and helps create the characteristic dry brush effect. A heavier weight paper (140lb/300gsm or higher) is preferable to prevent buckling or warping during painting.
Preparing the Workspace and Materials
Proper preparation is key to a smooth and enjoyable painting process. A well-organized workspace minimizes distractions and allows for focused creativity.
- Gather your materials: Assemble your paints, brushes, paper, a jar of clean water, and paper towels or a rag before you begin.
- Prepare your palette: If using tube paints, squeeze a small amount of each color onto your palette. If using pans, simply wet the paints slightly to activate them.
- Set up your workspace: Find a well-lit area with a stable surface. Ensure you have enough space to comfortably work and move your materials around.
- Prepare your brush: Dip your brush into the water, but only slightly. You want the brush to be damp, not soaking wet. Gently blot the brush on a paper towel to remove excess water. This is crucial for achieving the dry brush effect.
- Test your brush: Before applying paint to your paper, test the dampness of your brush on a scrap piece of paper. You should see broken color application rather than a smooth wash.
Basic Dry Brush Strokes and Techniques
Mastering dry brush watercolor techniques hinges on understanding how to manipulate the amount of water in your brush and the pressure you apply. This control allows for a wide range of expressive effects, from delicate washes to bold, textured strokes. Experimentation is key to discovering your own style and finding the perfect balance.
The key to successful dry brushing lies in the delicate balance between paint and water. A nearly dry brush, lightly loaded with paint, will create fine, scratchy lines and textures. Increasing the amount of water will gradually soften the effect, creating more blended washes. Conversely, heavier pressure with a drier brush will produce bolder, more textured marks, while lighter pressure yields subtle, wispy lines. The paper itself also plays a role; rougher papers will hold more paint and create a more textured effect than smoother papers.
Brush Strokes and Water Control
Various brushstrokes create diverse visual effects. Short, staccato strokes can suggest grass or fur, while long, sweeping strokes might depict a landscape. Circular motions can create interesting textural elements, mimicking flower petals or foliage. Experiment with applying varying pressure while executing these strokes to achieve diverse effects. For instance, applying more pressure will create a thicker, more opaque line, whereas lighter pressure creates thin, delicate lines. Control over the water content in the brush significantly impacts the stroke’s character. A drier brush produces more textured and broken lines, while a slightly wetter brush creates softer, more blended strokes.
Brush Type Comparison
Different brush types lend themselves to different dry brushing techniques. The bristle material, its absorbency, and overall shape all influence the final result. Choosing the right brush is crucial for achieving the desired effect.
| Brush Type | Bristle Material | Water Absorption | Best Use Case |
|---|---|---|---|
| Round Brush | Sable or Synthetic | Moderate | Fine details, delicate lines, controlled washes |
| Flat Brush | Hog Bristle or Synthetic | Low to Moderate | Broad strokes, textured washes, creating backgrounds |
| Fan Brush | Synthetic | Low | Grass, foliage, creating textured effects |
| Angular Brush | Synthetic | Low to Moderate | Sharp lines, creating branches, geometric patterns |
Simple Dry Brush Watercolor Projects for Beginners
Now that we’ve covered the basics of dry brush watercolor techniques, let’s put them into practice with some fun and easy projects. These projects will help solidify your understanding and build your confidence in using this versatile technique. We’ll focus on creating a single flower and a textured background, demonstrating the versatility of dry brushing.
Painting a Single Flower Using Dry Brush Techniques
This project allows you to practice controlling the amount of paint and water on your brush to create different levels of texture and color intensity. We’ll focus on a simple poppy, but the principles can be applied to any flower. Begin by sketching a simple poppy outline onto your watercolor paper. Use a light pencil sketch, as it will be less visible once the paint is applied. For the petals, load your brush with a crimson watercolor paint, ensuring the brush is only slightly damp. Apply the paint using short, light strokes, focusing on the direction of the petal’s natural curve.
Vary the pressure to create lighter and darker areas, mimicking the natural shading of a petal. For the center of the poppy, use a slightly darker crimson or even a touch of black mixed in, applying the paint in small, circular strokes. The center should be denser and darker than the petals. Finally, use a very light touch of yellow-green for the stem and leaves, using longer strokes to depict their shape. Remember to allow the paint to dry between layers if necessary to prevent muddiness. The final result should be a textured poppy with visible brushstrokes, showcasing the characteristic look of dry brush watercolor.
Creating a Textured Background Using Dry Brushing
Dry brushing is excellent for creating interesting textured backgrounds that add depth and visual interest to your artwork. For this project, we will create a textured sky background. Start by choosing a color palette; for a sunset effect, consider warm colors like oranges, yellows, and reds. Lightly wet your watercolor paper with clean water, but not soaking wet. Then, load your brush with one of your chosen colors, ensuring it’s only slightly damp.
Using a combination of horizontal and vertical strokes, apply the color to the paper, varying the pressure to create different densities of color and texture. Gradually introduce other colors, overlapping slightly to create a blended effect. For example, you might start with a light yellow at the top, gradually introducing oranges and reds towards the bottom. Don’t worry about perfect blending; the slightly uneven texture is part of the charm of dry brushing. The final background will exhibit a varied texture and color depth, demonstrating the capabilities of dry brushing for creating interesting backgrounds.
Blending Colors Effectively with the Dry Brush Technique

Blending colors with a dry brush requires a delicate touch and a slightly different approach than traditional watercolor blending. Instead of achieving smooth transitions, we aim for a more textured, impressionistic blend. To demonstrate, let’s create a simple landscape. Begin with a light wash of blue for the sky, allowing it to dry completely. Then, for the land, load your brush with a mixture of greens and browns, ensuring the brush is relatively dry.
Apply the greens and browns next to each other on the paper, but don’t over-blend. Use short, overlapping strokes to create a slightly textured effect where the colors meet. Instead of a smooth transition, you will have a more impressionistic, subtly blended landscape. The visible brushstrokes and slightly uneven color distribution will contribute to the overall texture and visual appeal. Experiment with different color combinations and pressure levels to see how the results vary.
Advanced Dry Brush Watercolor Techniques
Now that you’ve mastered the basics, let’s explore the more nuanced aspects of dry brush watercolor painting. This section delves into advanced techniques that will elevate your artwork from simple studies to expressive masterpieces. We’ll examine how to manipulate the dry brush to achieve a wider range of textures and effects, building upon your existing skills.
Advanced dry brush techniques involve a deeper understanding of paint consistency, water control, and paper interaction. By mastering these, you can create paintings with incredible depth and realism.
Layering, Lifting, and Splatters with Dry Brush
Layering, lifting, and splattering are powerful tools for creating visual interest and texture in dry brush watercolor. Layering involves applying successive washes of color, allowing each layer to partially dry before applying the next. This technique builds depth and complexity, while maintaining the characteristic scratchy texture of dry brush. Lifting involves removing paint from the paper using a dry brush, creating highlights or revealing underlying layers.
This can be particularly effective for depicting light reflecting off a surface. Splattering, achieved by flicking a dry brush loaded with paint, adds an element of spontaneity and texture, mimicking effects like rain or falling leaves. For example, a landscape could benefit from layered washes of sky and mountains, with lifted highlights on the mountain peaks and subtle splatter effects to suggest falling snow.
Creating Realistic Textures with Dry Brush
The unique characteristics of dry brush lend themselves perfectly to rendering a variety of realistic textures. The scratchy, broken lines created by a dry brush are ideal for depicting rough surfaces like tree bark or animal fur. By varying the pressure and angle of the brush, you can control the density and direction of the strokes, mimicking the natural irregularities of these textures.
For example, to create the texture of tree bark, you would use short, broken strokes of varying shades of brown and gray, applying more pressure in some areas to create deeper crevices and less pressure in others to create smoother surfaces. Similarly, depicting animal fur requires a delicate touch and varying brush strokes to create the illusion of individual hairs. The lighter strokes can represent the direction of fur growth, while darker strokes could represent shadows or areas of denser fur.
Dry Brushing Compared to Wet-on-Wet
Dry brush and wet-on-wet are fundamentally different watercolor techniques. Wet-on-wet involves applying wet paint to a wet surface, resulting in soft, blended colors and diffused edges. Dry brush, conversely, uses a relatively dry brush on a dry or semi-dry surface, resulting in crisp, textured strokes and distinct edges. Wet-on-wet is excellent for creating soft transitions and atmospheric effects, while dry brush excels at creating texture and detail.
A comparison might be that wet-on-wet is like using a smooth, flowing pen, whereas dry brush is more akin to using a scratchy charcoal pencil. The choice between the two depends on the desired effect; often, a combination of both techniques can yield the most compelling results. For instance, a painting of a misty landscape might utilize wet-on-wet for the atmospheric background and dry brush for the detailed foreground elements, such as rocks or vegetation.
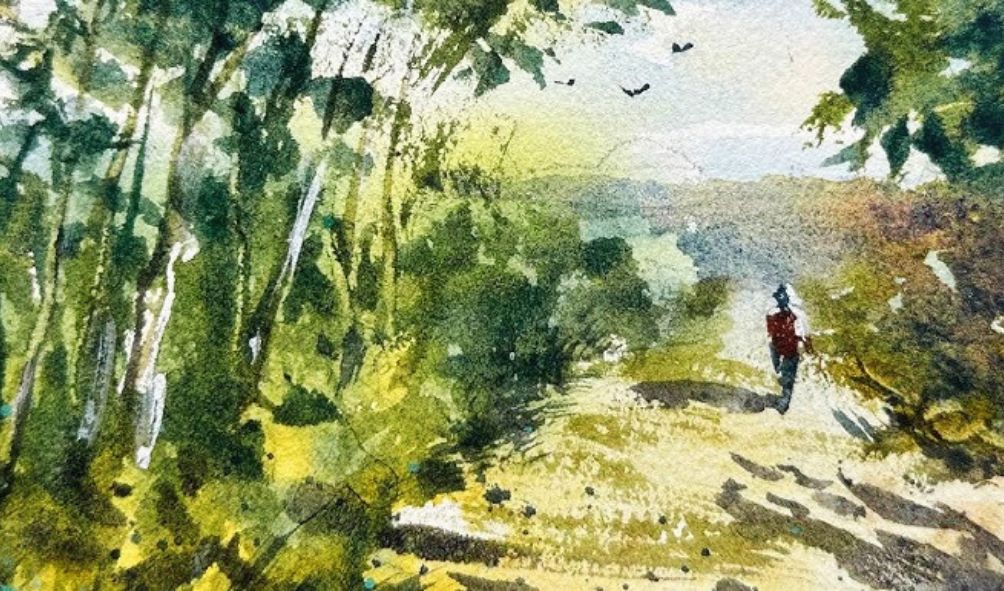
Dry Brush Watercolor Landscape Painting
Dry brush watercolor techniques offer a unique approach to landscape painting, allowing for expressive texture and a sense of immediacy. The slightly scratchy, textured effect perfectly captures the rough textures of natural landscapes, from craggy mountains to windswept fields. This section will guide you through creating a simple landscape using dry brush, explore suitable color palettes, and explain how to achieve depth and perspective.
A Simple Dry Brush Landscape Project: Step-by-Step Guide
This project focuses on a simplified mountain scene at sunset. We’ll use a limited palette for a cohesive and harmonious effect.
- Sketching: Lightly sketch the basic shapes of your mountains, sky, and any foreground elements (perhaps a few simple bushes or rocks) onto your watercolor paper. Keep it loose and don’t worry about perfect detail; this is just a guide.
- Sky: Using a pale yellow-orange (e.g., a mix of Cadmium Yellow and Cadmium Orange), apply a wash to the sky area. Leave some areas untouched for a brighter effect. Then, while still wet, use a dry brush loaded with a slightly darker orange-red (e.g., a mix of Cadmium Red and Burnt Sienna) to create texture and clouds. Apply the color with short, dabbing strokes.
- Mountains: Begin with a mid-tone purple (e.g., Dioxazine Purple) for the shadowed parts of the mountains, applying it with dry brush strokes to create texture. Then, add highlights with a dry brush and a lighter purple or even a pale gray (e.g., a mix of Payne’s Grey and white). The dry brush strokes will give the illusion of rock faces.
- Foreground: Use a darker green (e.g., Sap Green or Phthalo Green) with a dry brush to add a few simple bushes or rocks in the foreground. This adds depth and anchors the scene.
- Details: Once the painting is dry, you can add finer details with a very fine brush and a diluted version of your existing colors, if desired. Avoid overworking the painting, maintaining the textured effect of the dry brush.
Suitable Color Palettes for Dry Brush Landscape Painting
Choosing the right color palette is crucial for creating a cohesive and visually appealing landscape. Here are a few suggestions:
- Warm Sunset Palette: Cadmium Yellow, Cadmium Orange, Cadmium Red, Burnt Sienna, Raw Umber
- Cool Mountain Palette: Ultramarine Blue, Cerulean Blue, Dioxazine Purple, Payne’s Grey, Titanium White
- Autumnal Palette: Burnt Sienna, Yellow Ochre, Cadmium Red, Sap Green, Raw Umber
These palettes provide a good starting point. Feel free to experiment and adjust the colors to suit your personal preferences and the specific landscape you are painting.
Creating Depth and Perspective Using Dry Brush in a Landscape
Dry brush lends itself well to creating depth and perspective in landscapes. The textured strokes can subtly suggest distance and variations in terrain.
Depth is achieved by varying the color intensity and the density of the brushstrokes. More intense, densely applied colors will appear closer, while lighter, more loosely applied colors will recede into the background. For example, in a mountain scene, the foreground mountains can be painted with darker, more textured brushstrokes, while the distant mountains can be rendered with lighter, less textured strokes.
Perspective can be suggested by the size and placement of elements. Objects closer to the viewer will appear larger and more detailed, while those further away will be smaller and less detailed. This effect is enhanced by the use of atmospheric perspective – where the colors of distant objects become lighter and less saturated.
For instance, in a forest scene, the trees in the foreground can be painted with dark, thick brushstrokes showing individual branches and leaves, while those in the distance are suggested with lighter, thinner strokes, almost blending into the background.
Illustrative Examples: Dry Brush Textures
Exploring different dry brush textures opens up a world of artistic expression in watercolor painting. By manipulating the amount of water, pressure, and brush type, you can achieve a remarkable range of effects, from subtly nuanced to dramatically bold. The paper you choose also plays a crucial role in determining the final texture.
The following examples detail three distinct dry brush textures – rough, smooth, and stippled – and demonstrate how to create them. Understanding these foundational textures will empower you to create a vast array of visual effects in your work.
Rough Texture
Achieving a rough texture involves using a dry brush with minimal water and applying firm, uneven pressure. This technique creates a broken, almost scratchy effect, ideal for depicting elements like tree bark, rough stone walls, or textured fabrics. A stiff bristle brush, such as a hog bristle brush, works best for this.
The paper should have a slightly textured surface to enhance the roughness. Experiment with darker, earthier color palettes such as burnt umber, raw sienna, and deep greens to amplify the rough appearance. The strokes should be short, abrupt, and varied in direction, avoiding any smooth, continuous movements. Imagine the brush is scratching across the paper, rather than painting smoothly.
Smooth Texture
In contrast to the rough texture, a smooth dry brush effect requires a softer brush with a controlled amount of water and consistent, light pressure. This technique works well for creating subtle textures like weathered wood, smooth stone, or soft fabrics.
A soft round brush or a synthetic brush with fine bristles is ideal. The paper should have a smooth surface, such as cold-pressed watercolor paper. Lighter, more delicate color choices, such as pale yellows, soft blues, and muted greens, can enhance the smooth texture. The strokes should be long, fluid, and slightly overlapping, creating a seamless, even appearance.
Stippled Texture
A stippled texture involves using a dry brush to create a series of small, individual dots or marks. This technique is versatile and can be used to depict a variety of textures, from foliage to animal fur, depending on the size and spacing of the dots. A small round brush or even a pointed detail brush works well for stippling.
Cold-pressed watercolor paper provides a good surface for this technique. The color choice is largely dependent on the subject, but using a range of values within a single color family (e.g., various shades of green for foliage) can add depth and realism. The dots should be applied individually, varying slightly in size and spacing for a more natural appearance. Avoid applying them in a uniform pattern, which would create an unnatural look.
Creating the Texture of Tree Bark
To illustrate the application of dry brush techniques, let’s focus on creating the texture of tree bark. We’ll use a combination of rough and stippled textures for a realistic effect. Begin by sketching the basic shape of the tree trunk. Using a dry, stiff bristle brush loaded with a dark brown or grey wash (with minimal water), apply short, choppy strokes in a vertical direction to mimic the vertical fissures in tree bark. Then, using a smaller brush with a slightly lighter brown or grey, stipple small dots and dashes around the initial strokes to add detail and variation.
Vary the pressure and spacing of the stippling to create a more natural look. Finally, using a very light grey or white, lightly touch the surface to highlight the raised areas of the bark, adding depth and dimension. The combination of the rough strokes and the stippled texture will create a believable and textured representation of tree bark.
Troubleshooting Common Dry Brush Problems
Dry brush watercolor, while offering a unique textural appeal, can present challenges for beginners. Understanding common pitfalls and their solutions is key to mastering this technique and achieving consistent, pleasing results. This section addresses typical issues encountered and provides practical strategies for improvement.
Uneven Color Application and Lack of Control are Addressed
Uneven color application is a frequent problem. This often stems from inconsistent brush pressure, insufficient paint, or an overly dry brush. Lack of control manifests as unpredictable strokes and difficulty achieving desired shapes or textures. Addressing these issues requires attention to both technique and material selection.
Brush Pressure and Paint Consistency
Maintaining consistent, light pressure is crucial for even color distribution. Too much pressure will create harsh, scratchy lines, while too little will result in faint, patchy marks. The ideal pressure is a gentle, almost feather-light touch. The amount of paint on the brush is equally important. Too much paint will overwhelm the dry brush effect, resulting in a more traditional watercolor wash. Too little paint will lead to weak, pale strokes.
Experiment with the amount of paint on your brush until you find the sweet spot that delivers the desired level of color intensity and texture. Practice with different colors to see how the pigment’s consistency affects the final result. For instance, a highly pigmented color might require less paint than a more translucent one.
Brush Control and Stroke Technique
Improving brush control involves practicing various stroke techniques. Start with simple lines and gradually progress to more complex shapes and textures. Focus on the movement of your wrist and arm, rather than just your fingers. A relaxed grip allows for greater fluidity and precision. Experiment with different brush angles to observe how they affect the stroke’s character.
For example, a vertical brush stroke will create a different texture than a horizontal one. Regular practice will build muscle memory and improve your overall control and precision. Consider using a variety of brushes – round, flat, and angled – to see how their shapes influence the dry brush effect.
Correcting Errors and Improving Brush Control Exercises
Mistakes are inevitable, especially when learning a new technique. Fortunately, many dry brush errors can be corrected. If a stroke is too heavy or uneven, a slightly damp brush can be used to soften the edges and blend the color. If a stroke is too faint, more paint can be added and the stroke repeated. However, over-correction can sometimes create a muddy appearance, so it’s important to exercise caution. To improve brush control, dedicate time to simple exercises such as drawing lines, circles, and other basic shapes using the dry brush technique.
Focus on maintaining consistent pressure and speed throughout each stroke. Gradually increase the complexity of your exercises, incorporating shading and blending techniques. A helpful exercise involves repeatedly creating small, consistent dots or dashes to improve precision and control. Another is practicing controlled changes in pressure to create subtle variations in line weight and texture.
Last Recap
Mastering the dry brush watercolor technique opens a world of artistic possibilities. From delicate floral studies to expressive landscapes, the versatility of this method allows for a wide range of creative exploration. By understanding the fundamentals of brushstrokes, water control, and color blending, you can unlock the unique textures and expressive qualities that define dry brush watercolor. This tutorial serves as a foundation for your continued artistic growth, encouraging experimentation and the development of your individual style. Embrace the journey, and enjoy the process of creating beautiful and evocative artwork.
Read More:
- Best Drawing Tablets for Artists
- Sell Art Online and Make Money
- How to Start a Resin Art Business: Best Guide for Beginners in 2025